02/05/2011

UDK Render Presentation Poster

A hi-res presentation render of my Jeep asset and diorama taken in UDK.


I edited the image levels becuse the original was poster was too dark.


01/05/2011

UDK Level

I imported my texture maps and Jeep asset into the UDK content browser. I also imported my diorama scene and duplicated it to create a level to roam in.
I used the material editor to texture my Jeep and other assets. This included a spec map for the Jeep shell.
As you can see I used a additive level and built a platform to place my diorama on.I used UDK to add collision to the assets. With the walls though, I created a collision mesh in Maya as it was more specific collision I wanted. I wanted the user to be able to get clos to the wall, but not be able to jump over it.


When it came to lighting the scene I wanted an evening scene, so I selected the skydome with a sunset texture. This helped with selecting the right lighting. Which included using an orange light for the front to help show the sunset seen on the skydome texture.


A quick screenshot of level in game.

22/04/2011

Diorama Renders

Here are some Maya mental ray render shots of my Jeep & diorama with a quick lighting experiment.

17/04/2011

Textured Jeep / Diorama

Here are some screenshots of the Jeep and diorama fully textured.


05/04/2011

Jeep + Diorama Maps / Texture References

Here are the texture maps for the Jeep and diorama. I used photographs of my own textures I had taken as well as sourced from online. I also painted the mud effect for the Jeep using the brushes in Photoshop.
1024 x 1024


1024 x 1024

1024 x 1024
I also had a go at creating a specular map in Photoshop (using a video tutorial) for the Jeep shell for when I import it into UDK.


Texture References


01/04/2011

Jeep + Environment UV

The UV maps for the jeep model and environment.


Here is a revised UV maps for the Jeep add-ons

28/03/2011

Environment Model

Here is the model I have created for the environment. As you can see there is a broken building which will surround the jeep. I have included some extra detail with some sandbags and sign post, as well as some broken wood coming out of the wall.


With both models complete, I will now focus on mapping the models.

25/03/2011

Extra reference material

Before creating the environment I've decided to collect some extra reference material.


22/03/2011

Jeep add-ons

I have finished modelling the add-ons for the jeep to make the model complete. This includes the 5 wheels (one on the back) & jerry can for the back. The interior has a steering wheel and two seats built in. I have also added a windscreen, which is seperate to the shell.


On further review I decided to change the seats and steering wheel. The seats were more defined as well as the steering wheel.

New model


Here is the jeep shell combined with add on to complete the Jeep.
 
---------------
 
I have also started drawing up some concept sketches for how the jeep will sit within my diorama as well as environmental extras.

21/03/2011

Jeep Shell Complete

This is the completed jeep shell. I used the duplicate special option on the half of the jeep model I had, to make the shell whole. I've added a front bumper and a front drive shaft underneath, for the front wheels. This is so it doesn't look like the wheels are floating.

I've started modelling the extra parts for the model, the seats, jerry can and wheels. Also I am working on the steering wheel and windscreen.


14/03/2011

Jeep Shell Update

Here is an update on the Jeep modelling progress. I decided to scrap the previous model and start again to create a better shape of the shell and to cut down on polys. I have also added more detail to the Jeeps shell with exterior handles and flatfender. I also added a hood and grill to the front of the shell, along with the front bumper.
Old shape

New shape


Once I have mirrored the shell I will start working on adding the wheels, windscreen & interior of the jeep.

10/03/2011

Jeep Shell

I have started creating one half of the jeep shell. Once it is complete I will use mirror geometry to have the full shell.

I used the create polygon tool, to draw out the shape of the shell using the side view blueprint image.

Jeep Reference Images

I have decided to go with the WW2 Willys Jeep scene. I have gathered reference images of the jeep I will be creating. The jeep will be the main asset of the diorama. I will also include a broken building, some rubble as well.

This is the jeep blueprint I acquired from the-blueprints.com

04/03/2011

Diorama Ideas


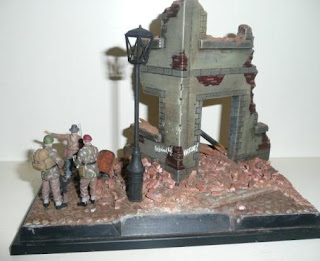
Here are some of the ideas I am thinking of using for my diorama along with the asset to be used. I have managed to gather some reference material of actual dioramas that people have created.


WW2 Jeep (main asset) in village with broken building


I really like the idea of this scene. Modelling the Jeep with part of a crumbling building. I believe I can create a real nice looking WW2 feel.


 Car (main asset) at an American 50's petrol station

With this diorama, I like the idea of creating an old 1950's car. Also the artwork & design on the gas pumps and mayabe adding an old advertisement board as well, would make a nice challenge.


Junkyard with abandoned shack and car (main asset)
 
With this idea, I could work with creating a messy, grungey looking environment. I could focus on the rust and dirt on the abandoned car. Making it look wrecked.